If you’ve spoken to me anytime over the past six months, you’ll know the amazing people at Fourth Estate Creative and I have been working our socks off, interviewing international magazine publishers to create our 21st Century Magazine Publishing training course.
We’ve talked to close to 60 publishers about what they’ve done, why they’ve done it and what other publishers can learn from them, then we’ve taken the best bits and applied them to different lessons.
We’re now in the process of connecting each interview with scripted voice overs, giving a wider knowledge of the subject from our research.
Which is where an incredible sound booth comes in handy.
We had a few things to think about when creating the booth. The magazine industry moves quickly, so the training course will be updated as old information becomes less relevant – meaning this will be an ongoing project. I also work from home, share an office with my partner for the foreseeable future, and don’t have a spare room in the house just waiting to be turned into a studio. A 3/4 hr voice over can take a day to record – this will improve as we practice, but initially, this is what we expected.
This all means that I needed a solution for recording voice-overs that:
- Gives us excellent, studio quality sound
- Is long-term
- Enables me to stand up – voice overs sound better this way
- Doesn’t break the bank
- Can be removed and reinstated easily
- Is comfortable and not too warm (recording under a duvet is not an option for a full-days recording)
What we tried first
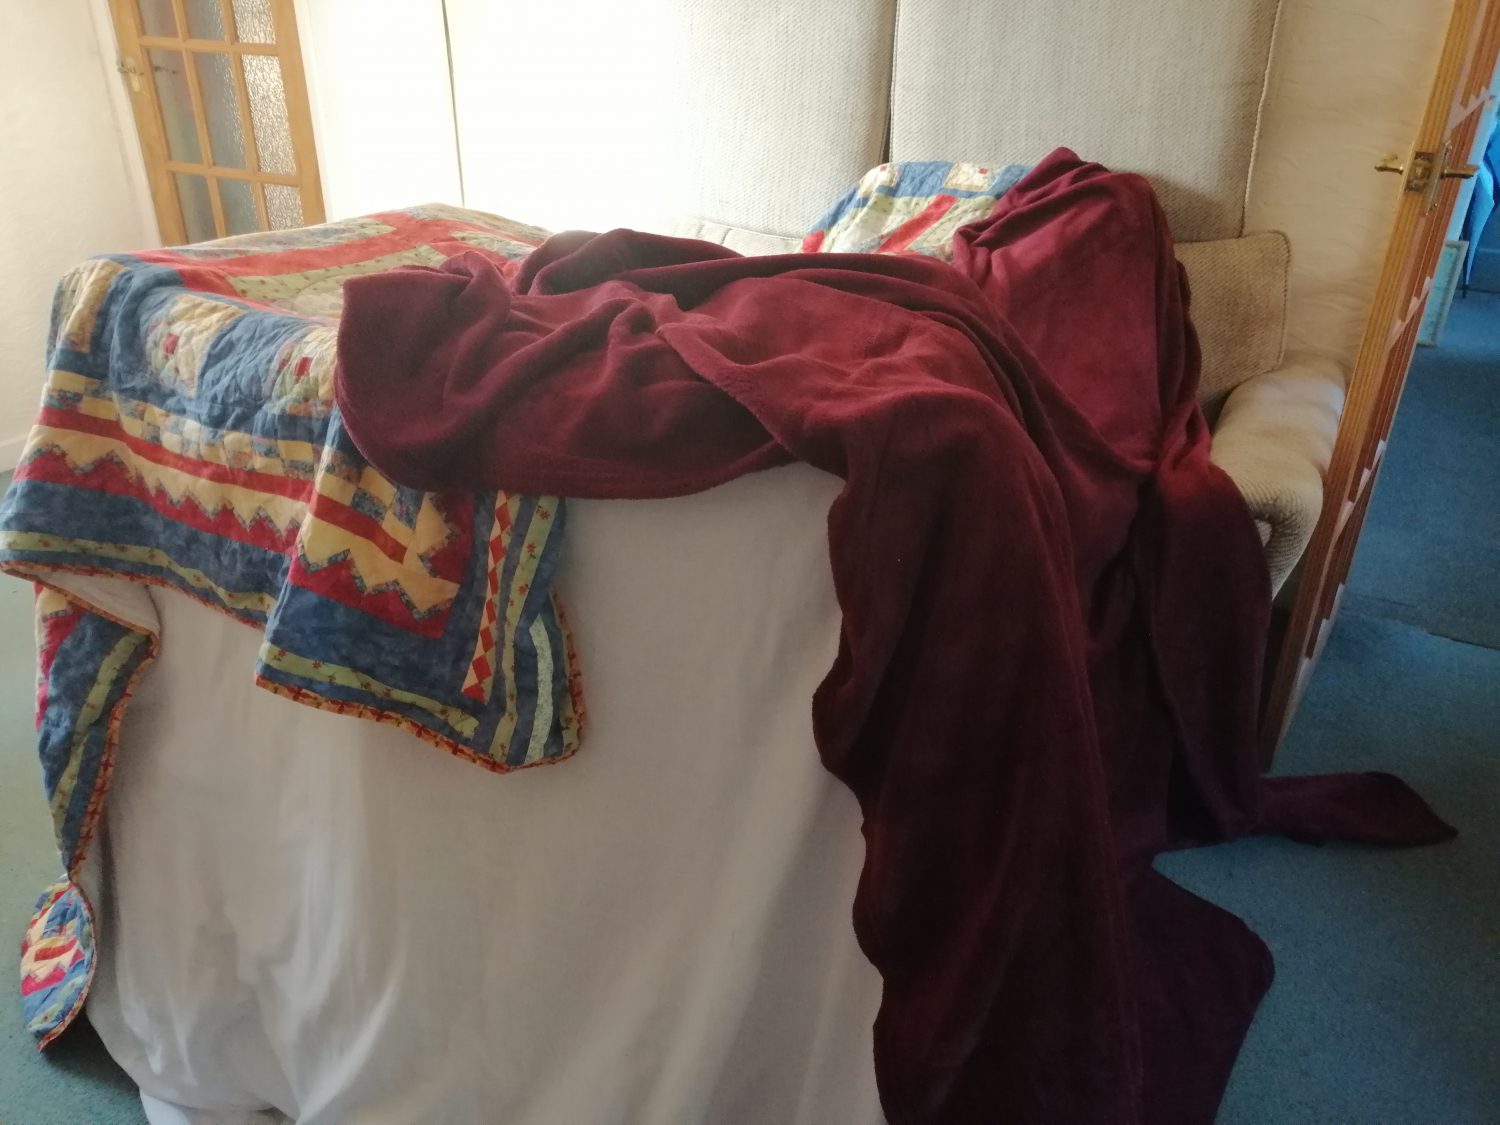
First, this is what we came up with. Basically a den in my living room for my three year old who, not surprisingly, wasn’t happy when we wanted to take it down. Also very warm in there and you can’t stand up. Sound was good though!
Procrastination
Like most people, it sometimes takes me a few days to come round to things. So when my partner suggested buying a shower rail and hanging curtains from the ceiling in our already cramped office, I thought he was over-engineering things just a little. However, after trying out the duvet/couch combo above, started to come round to the idea.
A good mic
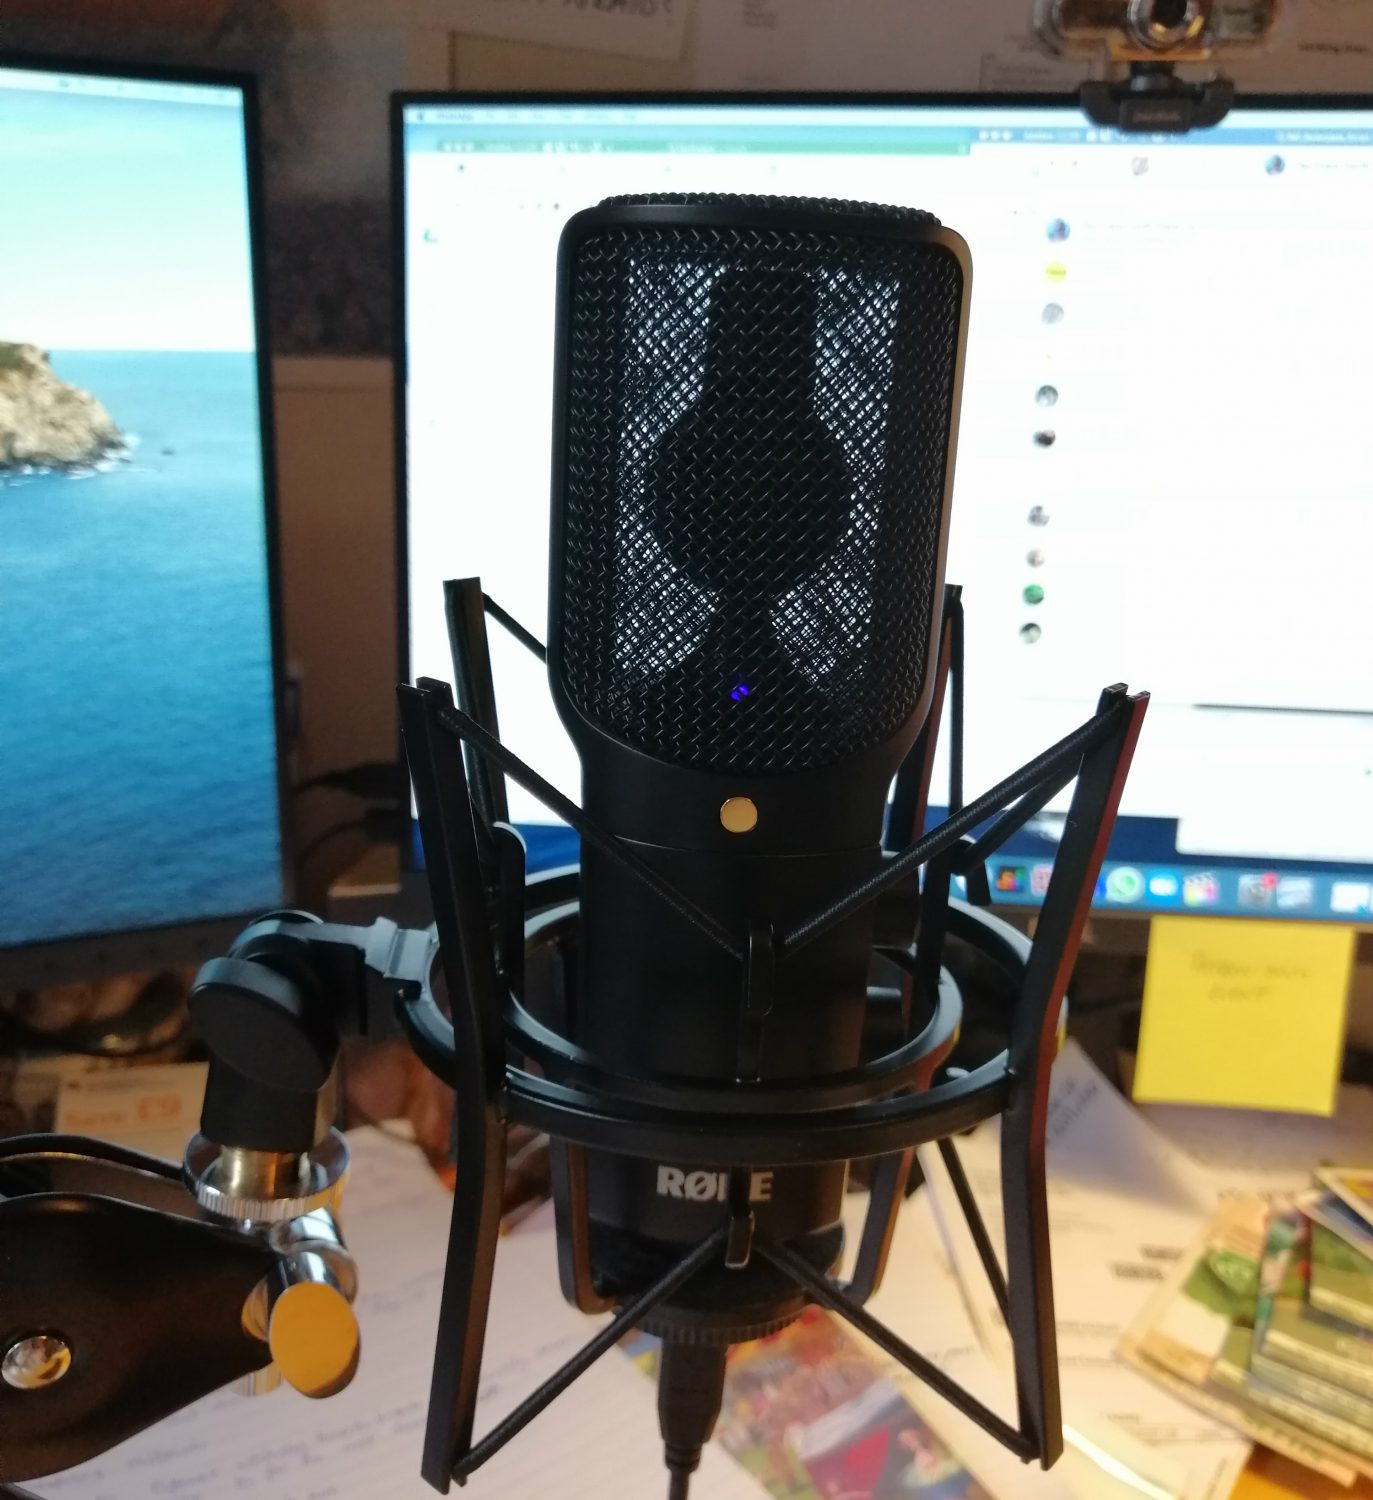
Now convinced of the benefits of what I had been assured would be the most incredible Sound Booth the world had ever seen, we bought a good mic to put in it – we chose a Rode at £150. I’d love to tell you all the reasons, but tech is not my strong point, so I put my trust in my IT person, and again was assured of all things incredible. Anyone I have told since (podcasters mostly) that I have a Rode has been enthusiastic, and the sound tests we’ve done have surpassed anything I could have hoped for, so I’d recommend it.
Beginnings of the Booth
Next we bought an oval shower rail – by far the most expensive part of the booth at £120. I would have probably screwed the shower rail arms directly into the ceiling as have very little DIY experience beyond painting, but it was pointed out to me that we didn’t know where the beams were, so instead we screwed them to this big bit of wood that had been sitting in our garden for the past five years.
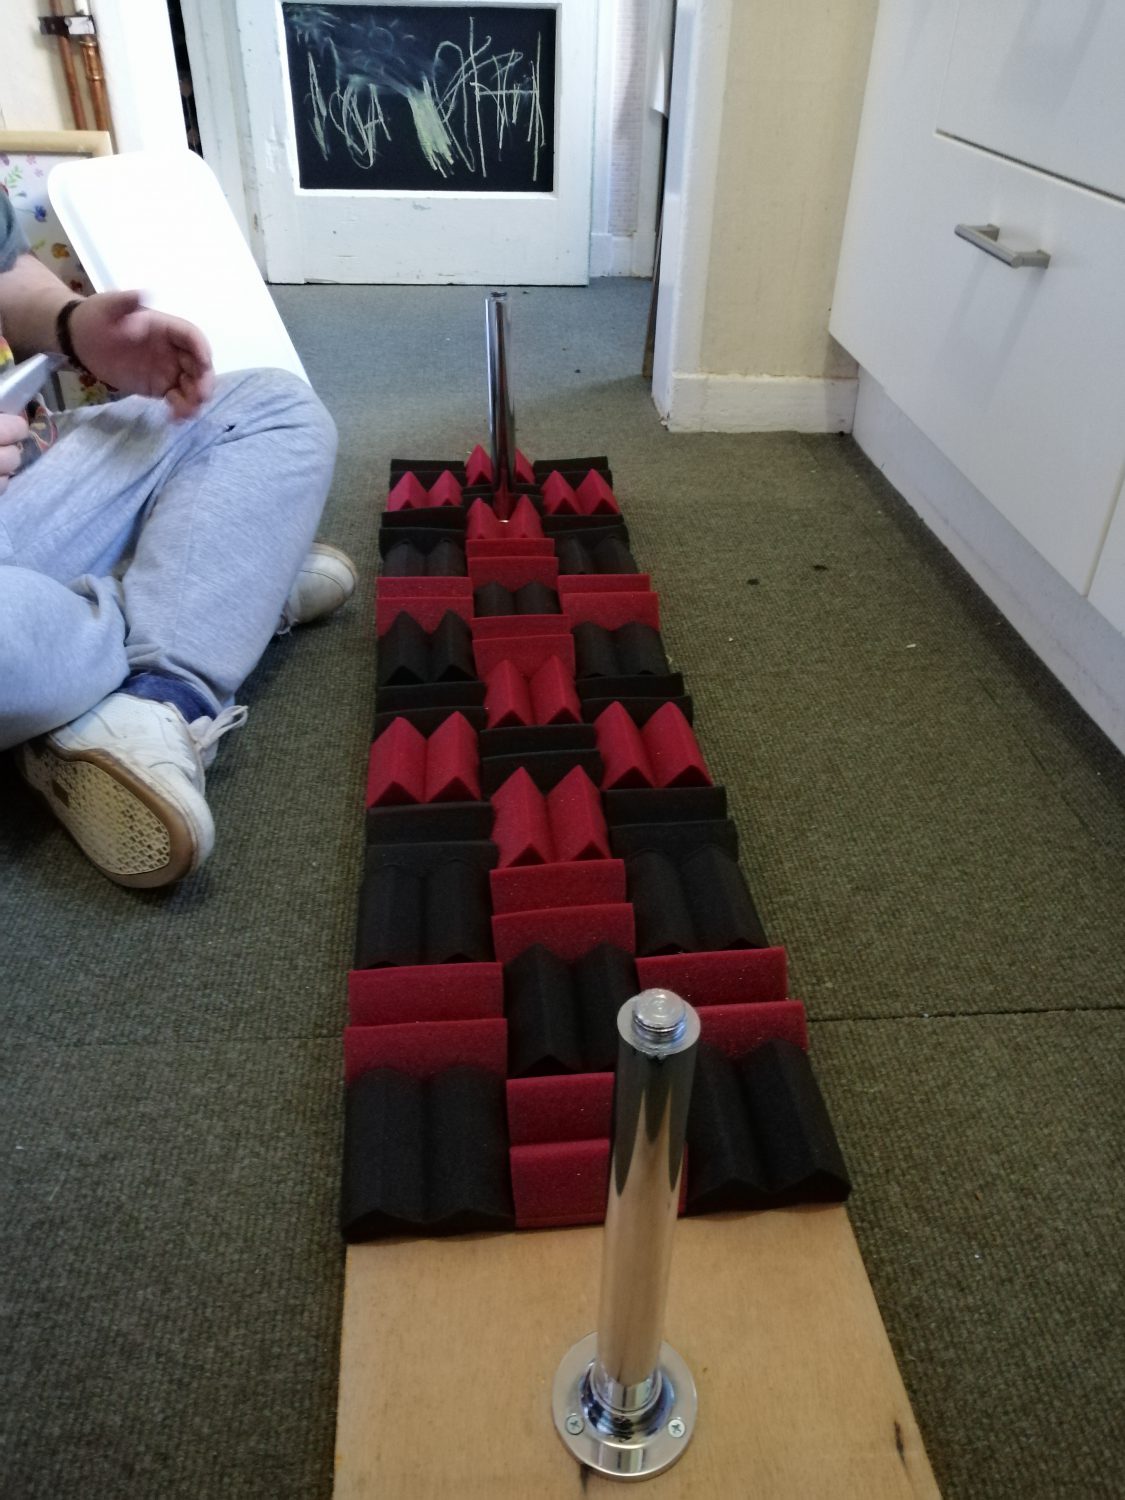
Then we took our sound proof tiles – £20 for a box of 12 – and stuck them on the wood, cutting out holes for the shower rail arms as we went. Ever fitted a carpet? We did it like that.
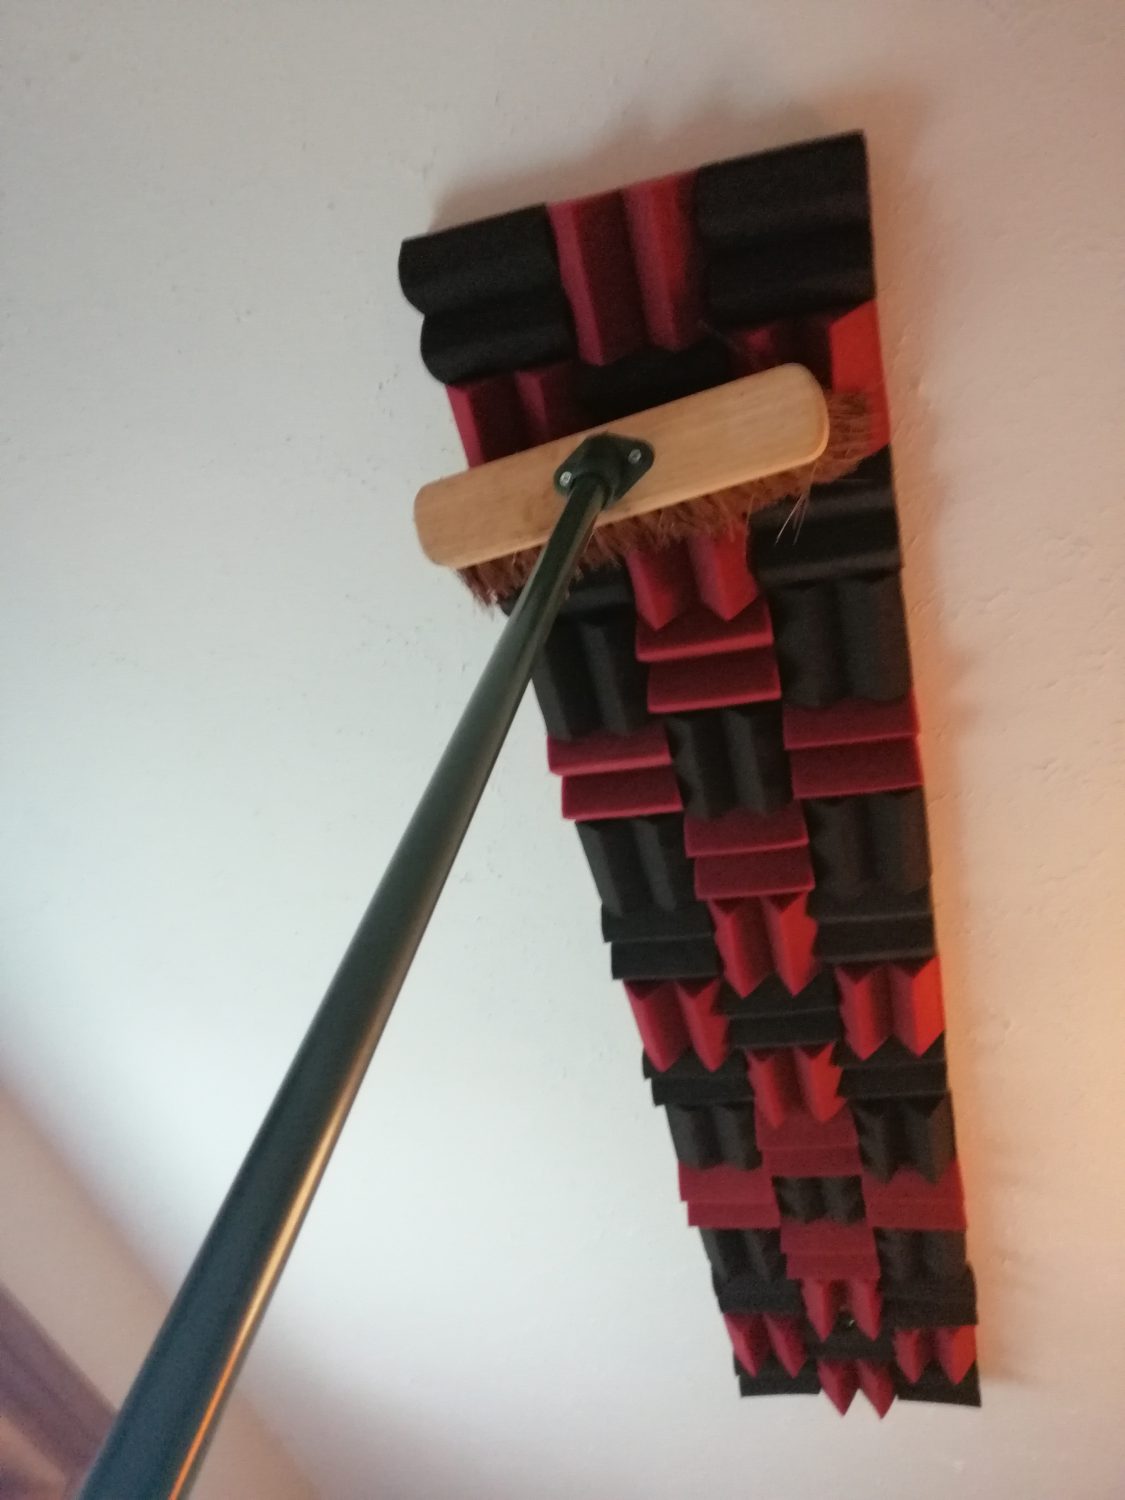
Next we mounted it on the ceiling, removing the shower rail arms first. This is me holding one end up with a broom so that we could screw in the other side, not me giving the ceiling a quick sweep. Drilling through the sponge was a pain, but we were really happy with the alignment and with the positioning of the holes for the shower rail arms, so it was worth it.
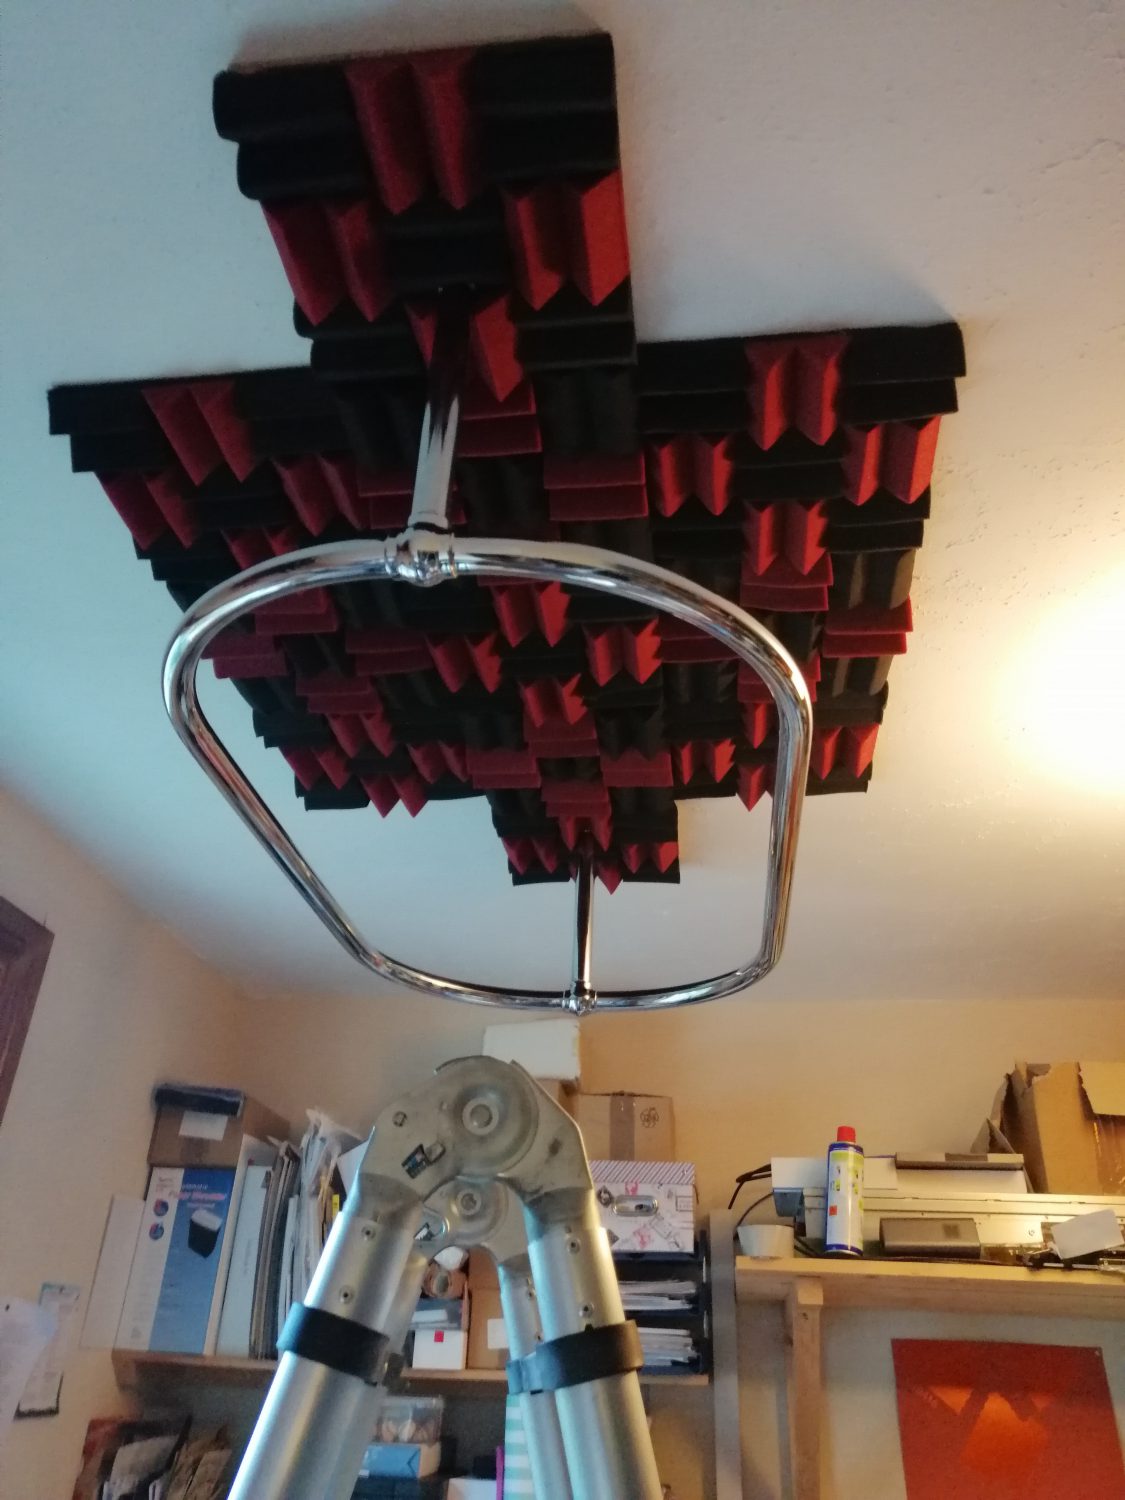
Next we fitted the shower rail and put up some more sound proof tiles.
Then the sewing began. I’m not a fan of sewing so this took about six times as long as everything else did, mostly with me procrastinating with, weirdly, other sewing.
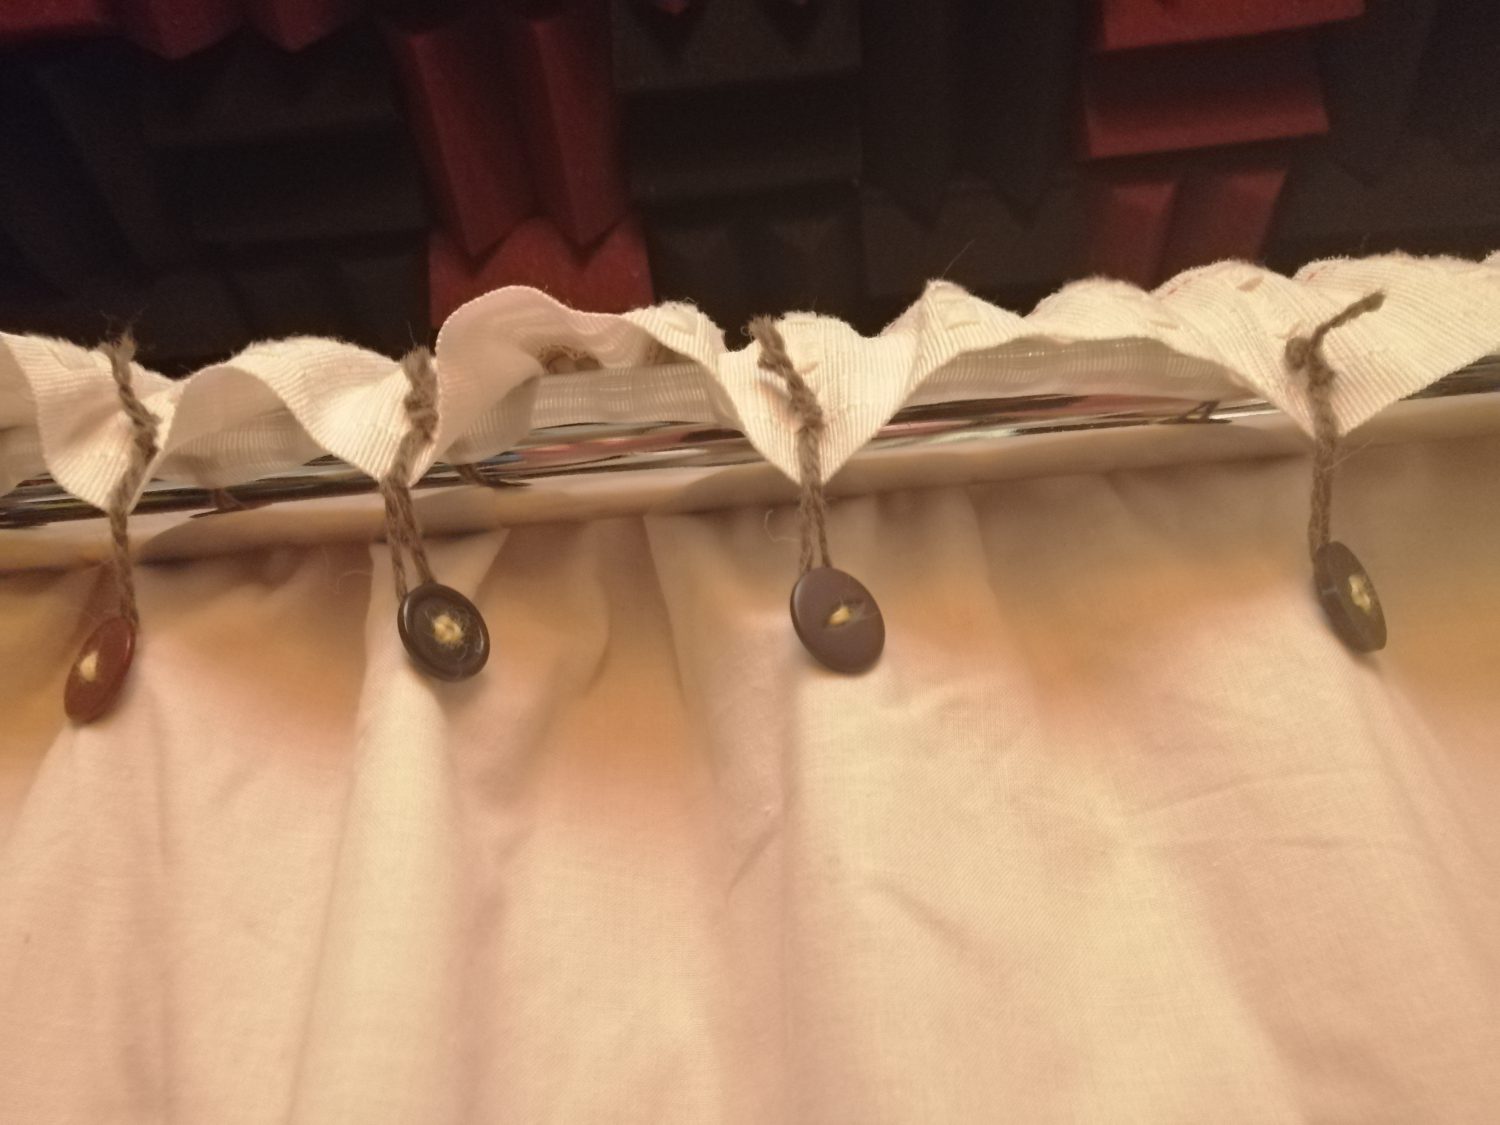
My Mum gave me some old curtains (thanks Mum!) and I sewed buttons all along the tops, then a separate loop for each button. We needed to be able to put the buttons on the outside, so that the shower rail itself didn’t bounce the sound. Yes, we were getting pedantic by this stage, but really who wouldn’t after the previous effort put in?
The Wondrous Sound Booth!
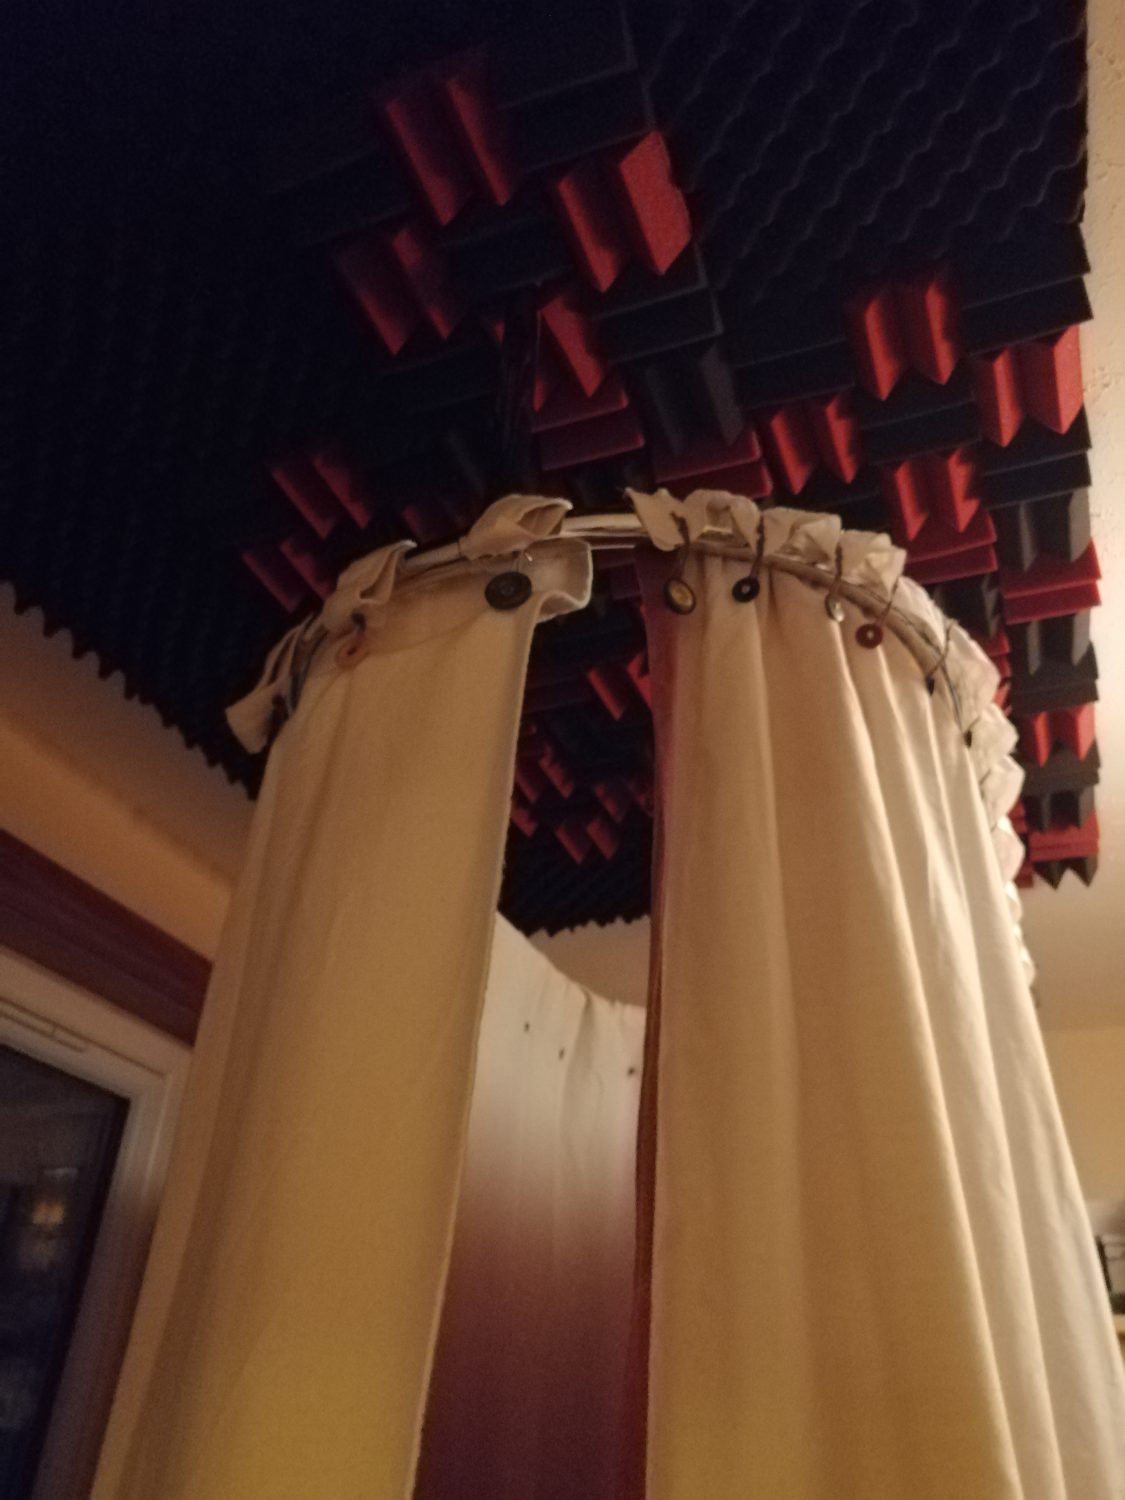
And this is the finished result – hooray! We bought a few more soundproof tiles so the full height was covered and so they reached further to the door, which would be behind you if you were taking this photo.
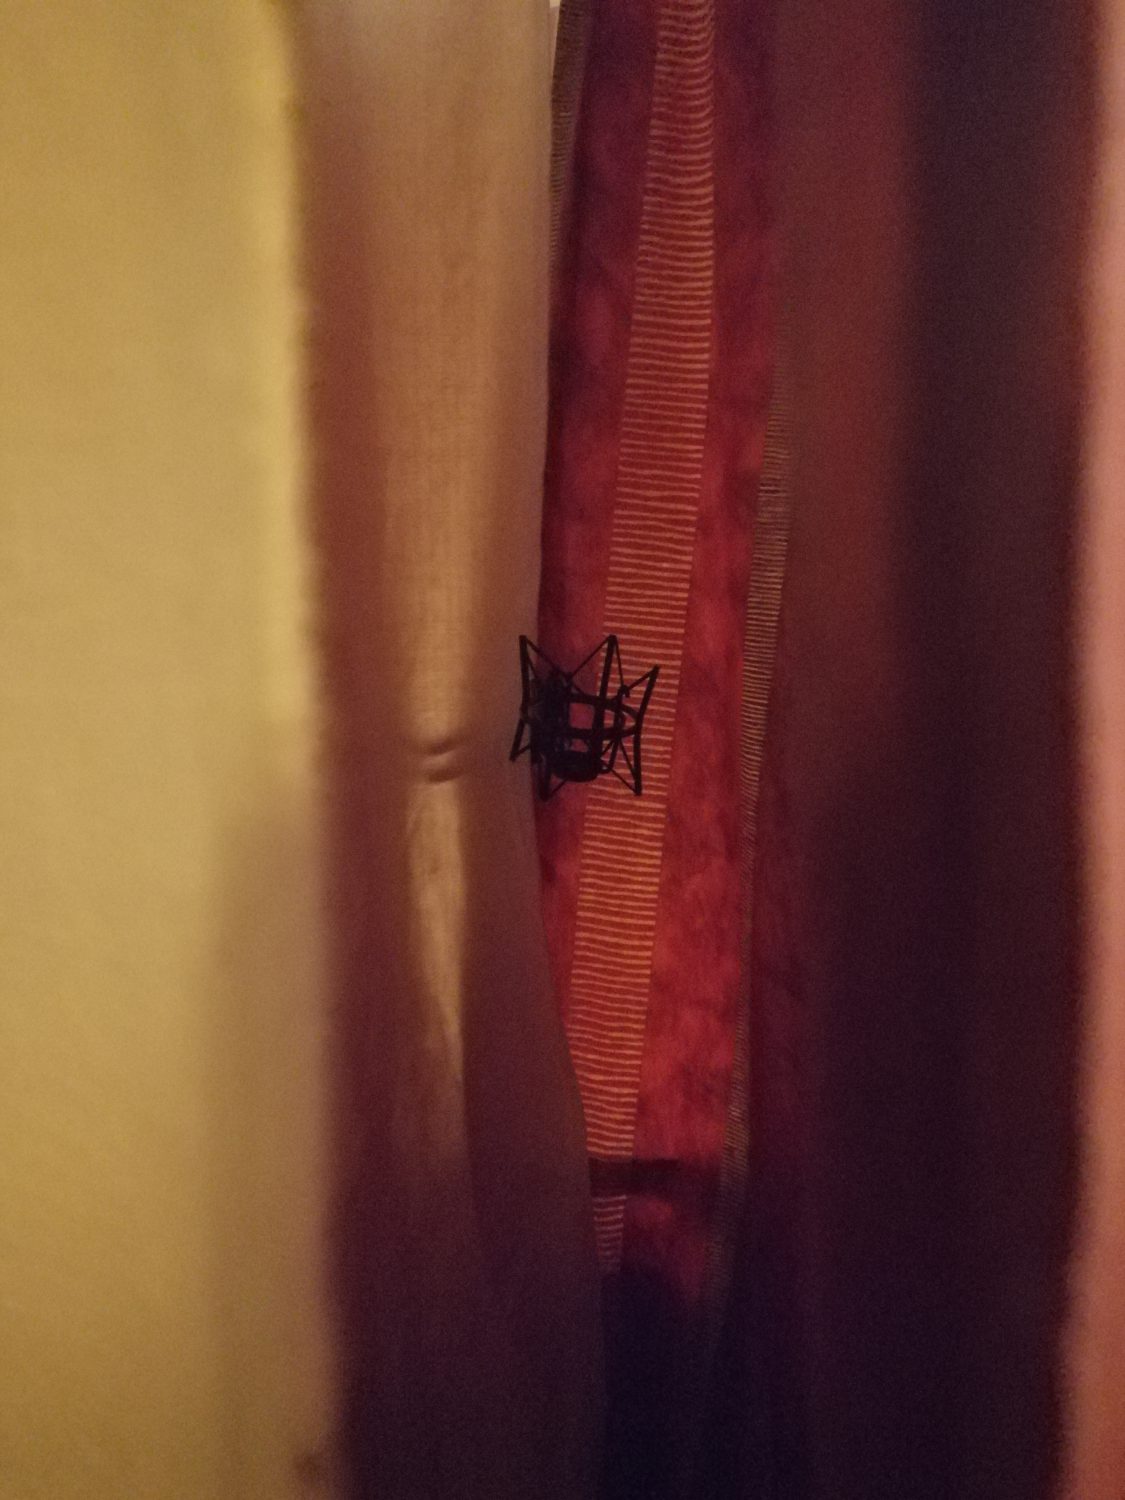
This is inside – that’s the cage for the mic. Looks cosy huh? Yes, but not too warm, because it’s got that nice gap at the top between the rail and the ceiling.
And this is its full length, touching the floor. And because it’s curtains, we can just lift them up and pop them over the arm of the mic when I’m not using them.
Not bad huh?